Sunday 13 July 2014

look at that doggie in the window

For a long time I didn't like dogs.  It probably had a lot to do with the big dogs that scared me when I was a kid.  I still have vivid memories of running home with my sister as fast as our little four year-old legs could carry us when we were chased frightened by a neighbourhood dog.  The dog probably didn't even step outside its owner's property but we didn't look back, ran really, really fast and pounded on the door when we were home in case the dog was hot on our trail....  Yep, fair to say that sort of experience left me scarred.

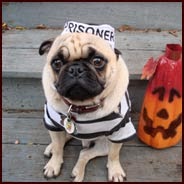
Then there was Snuffy, the pug dog that belonged to family friends.  Snuffy was well-named - she dribbled and sniffed and snuffled about - and she was an ugly looking dog.  Why would you want a dog, I thought?

Even now,  I don't really understand dog owners.  They always think their dog is clean (and cleaner than all the other dogs) and dog owners never wash their hands after patting their dogs.... even when they then handle food! Yuck!  

I guess I'm a bit of a fur-phobic but sometimes, momentarily, I think I'd quite like a dog.  Then I come to my senses and realise that I don't like dog hair (especially in my food), I don't like dog poop, and we are never home and we travel a lot so the poor little critter would always be in dog jail.  


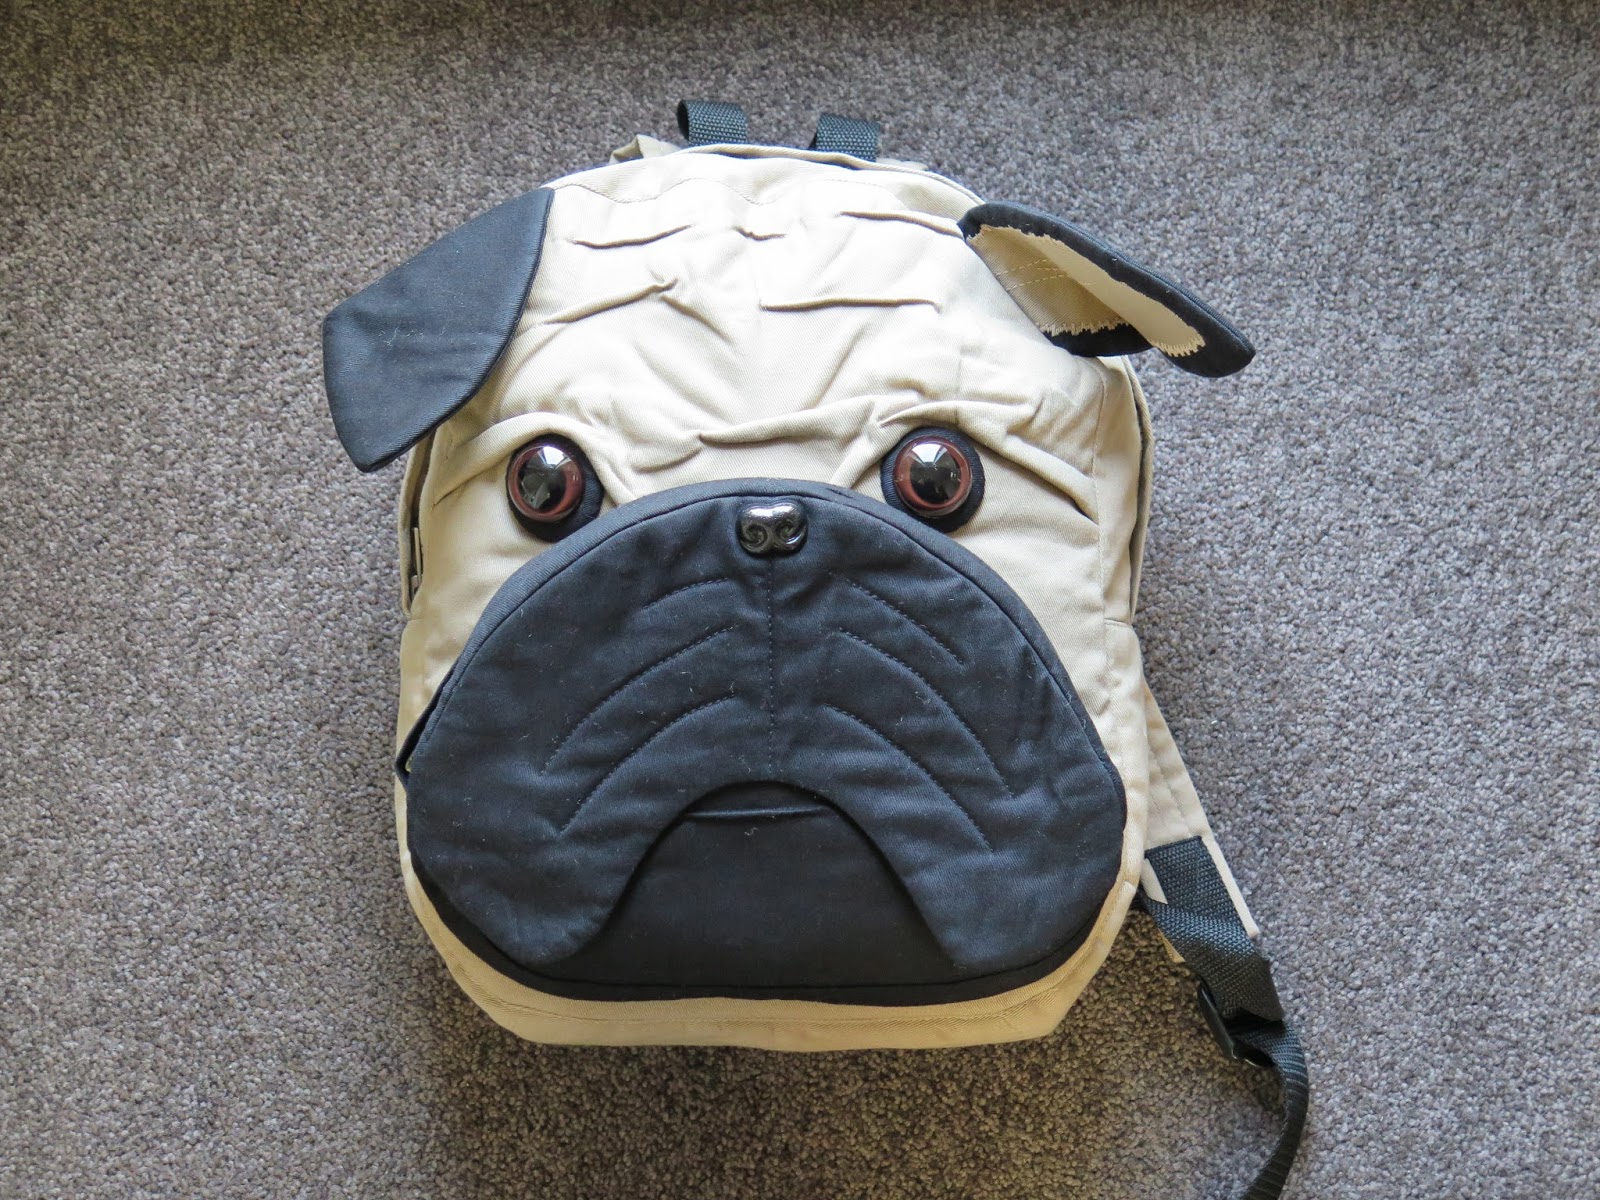
So, I did the next best thing... I made a dog!  And look, no hair!!  And it's a pug!  Plus, it's useful too....


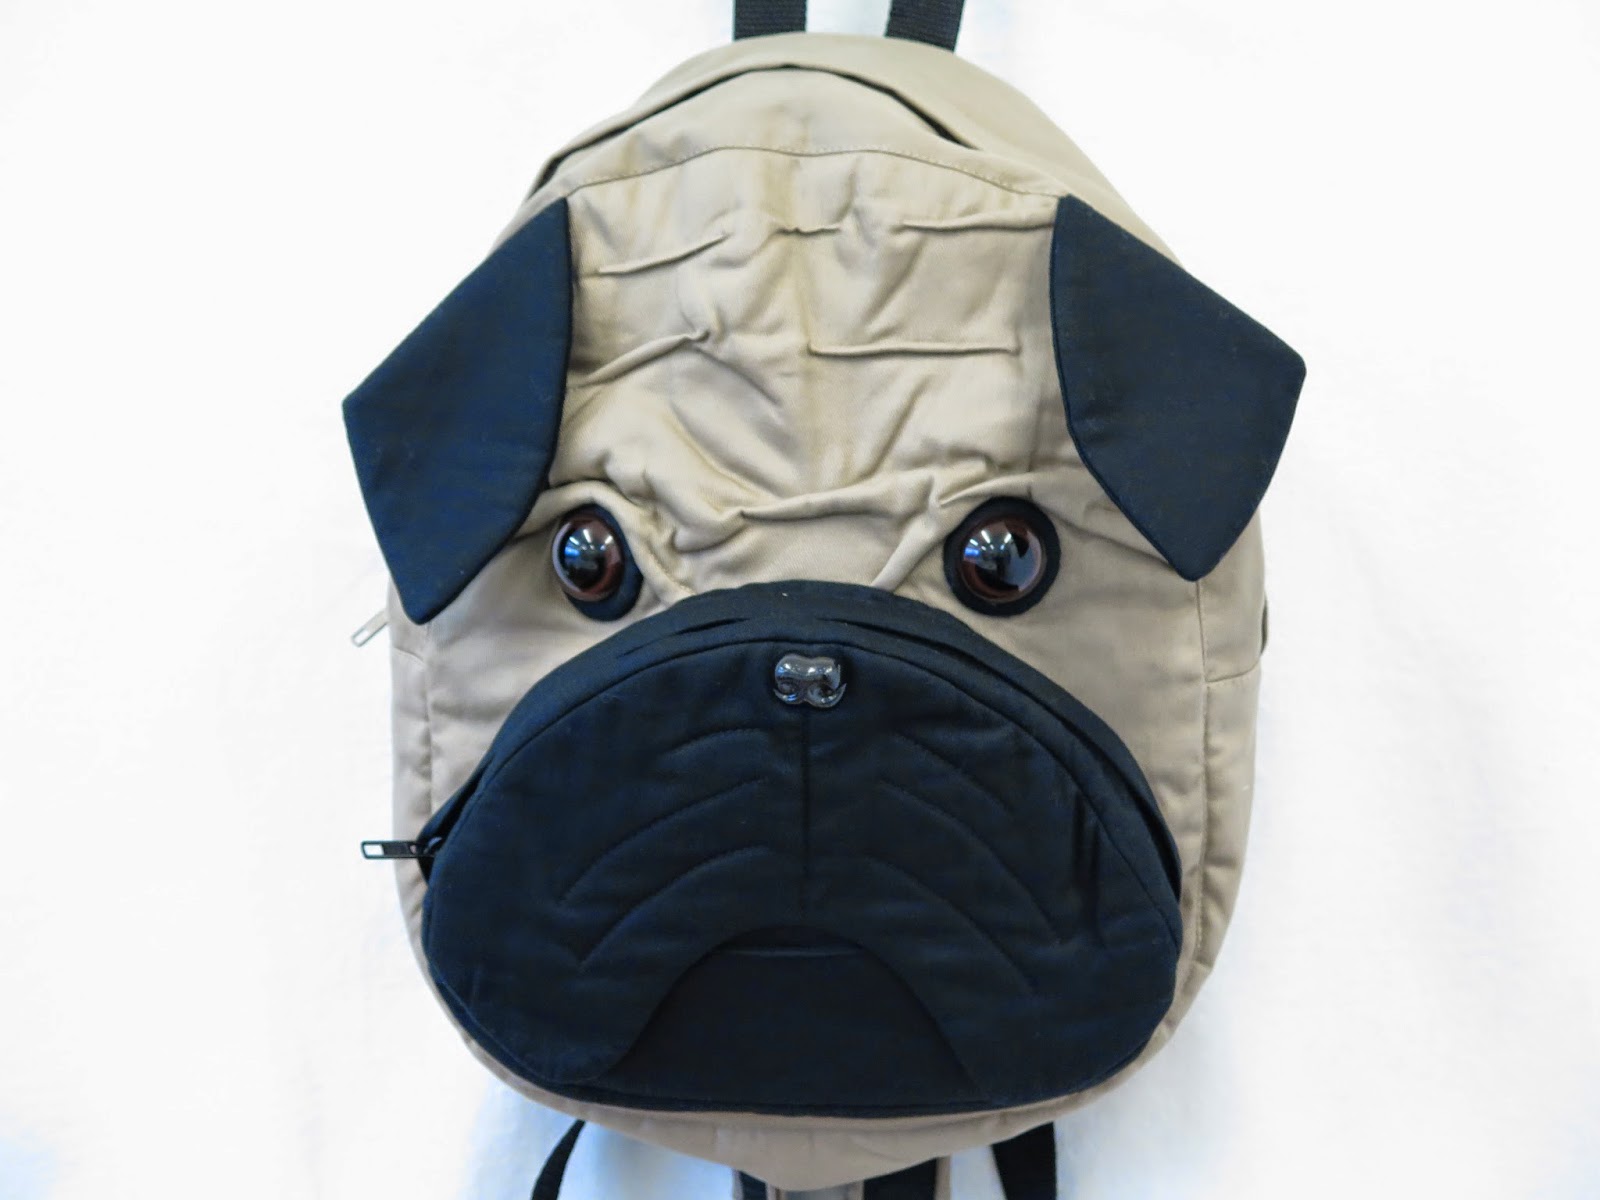
I used the Little Things to Sew backpack pattern and modified it to make my doggie backpack.  I wanted my pug to look like a pug so I searched the Internet for pictures.  There were thousands of them including a site for dog judges that I used to get the right look...

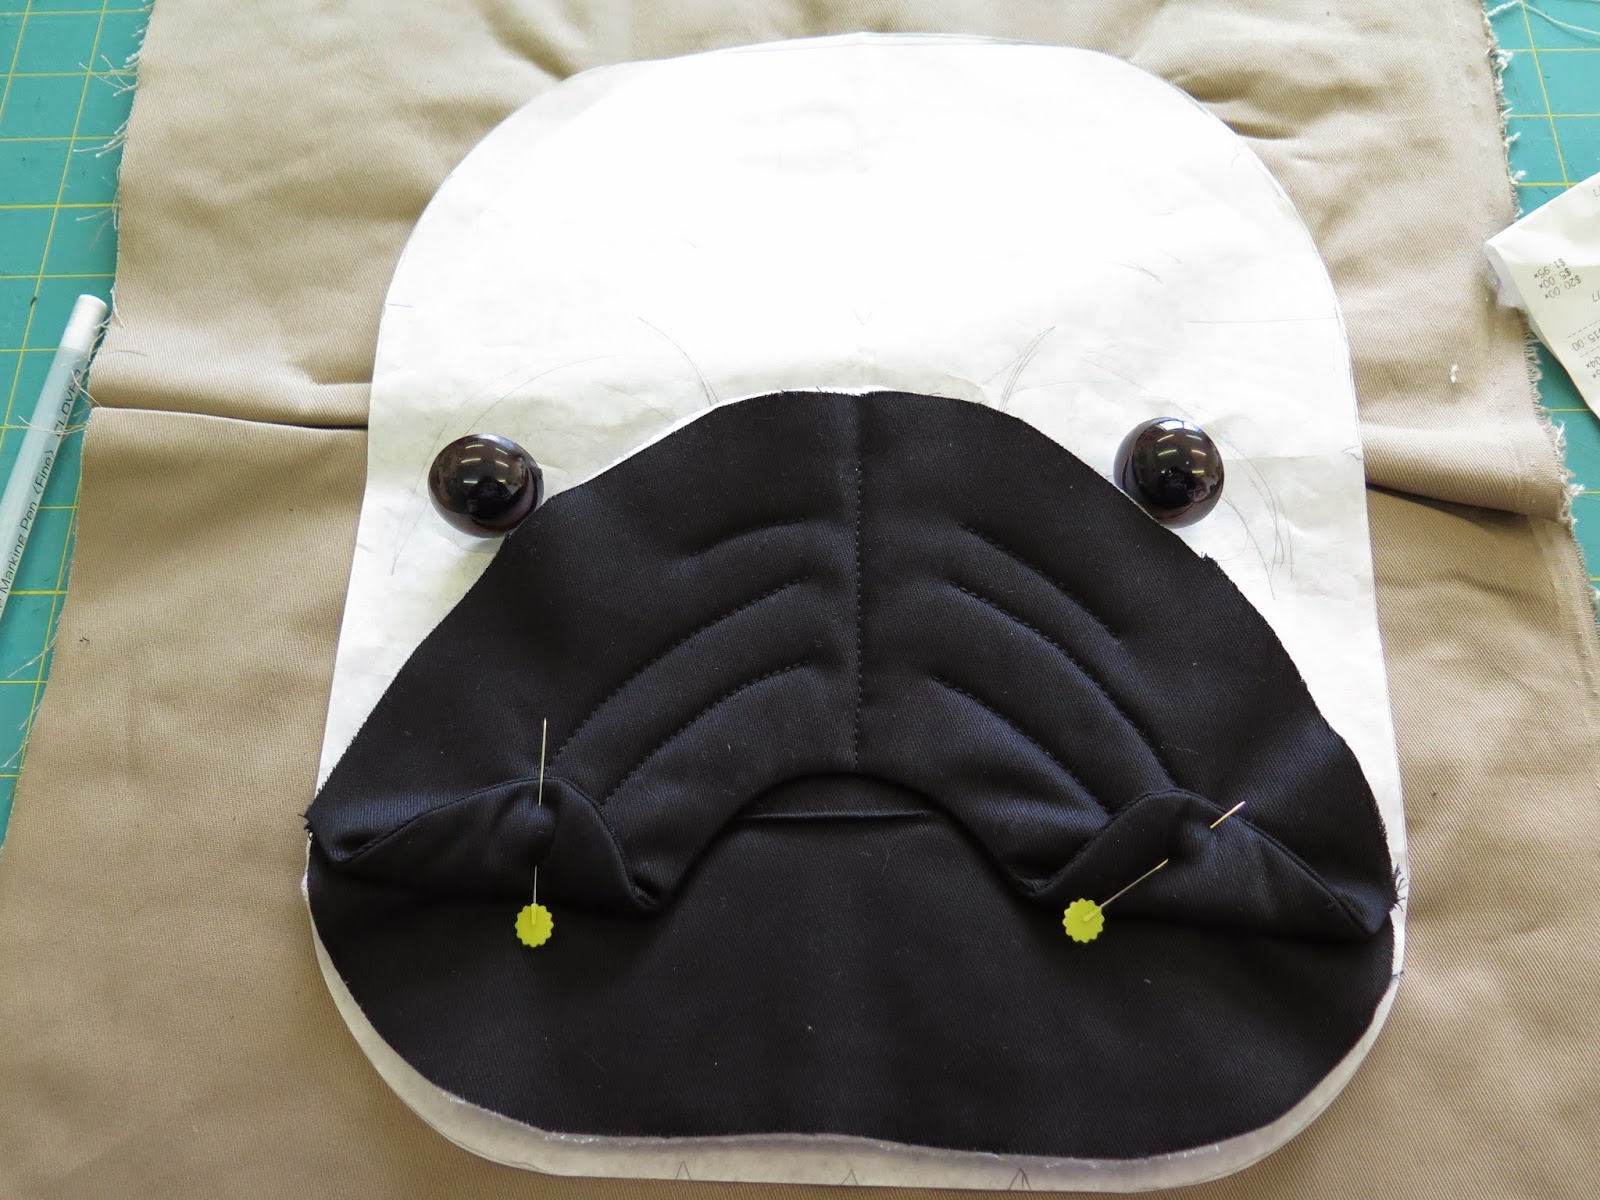
First, I drew my design out onto the backpack pattern pieces using a picture as my guide


and prepared my fabric by fusing Pellon to the back and sewing wrinkles in the forehead area


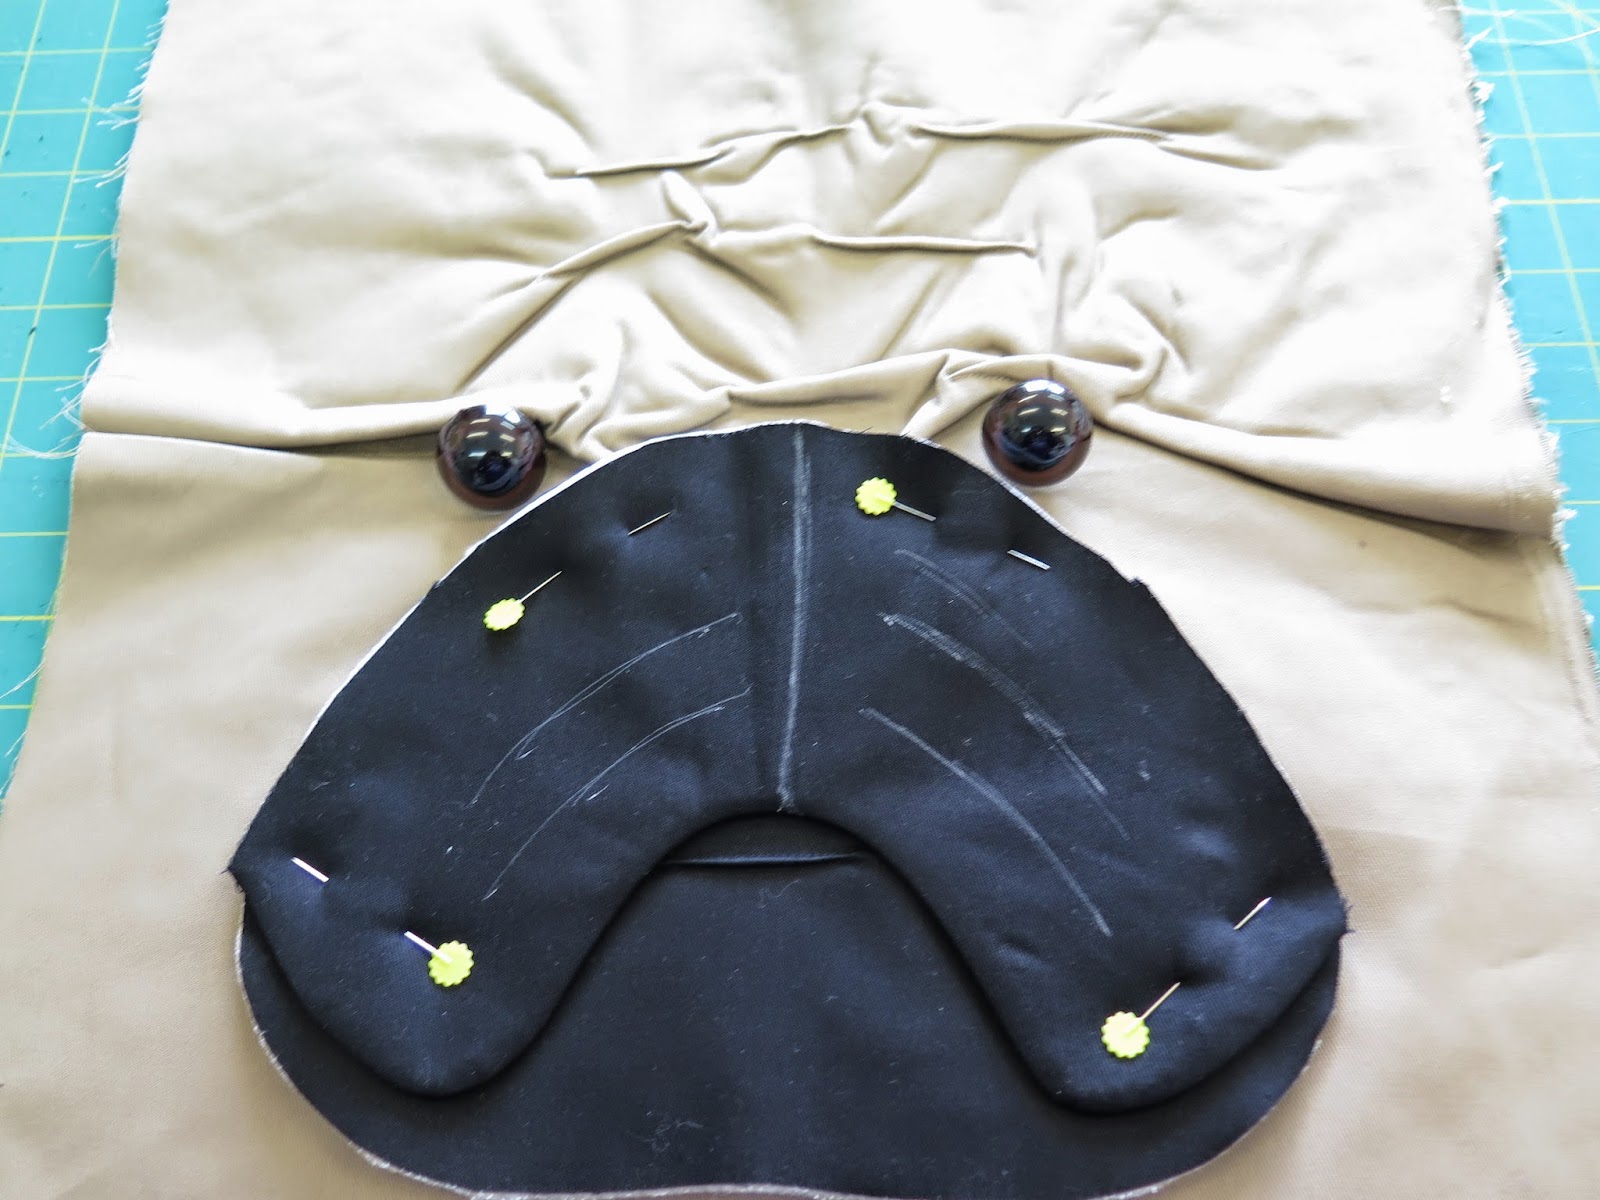
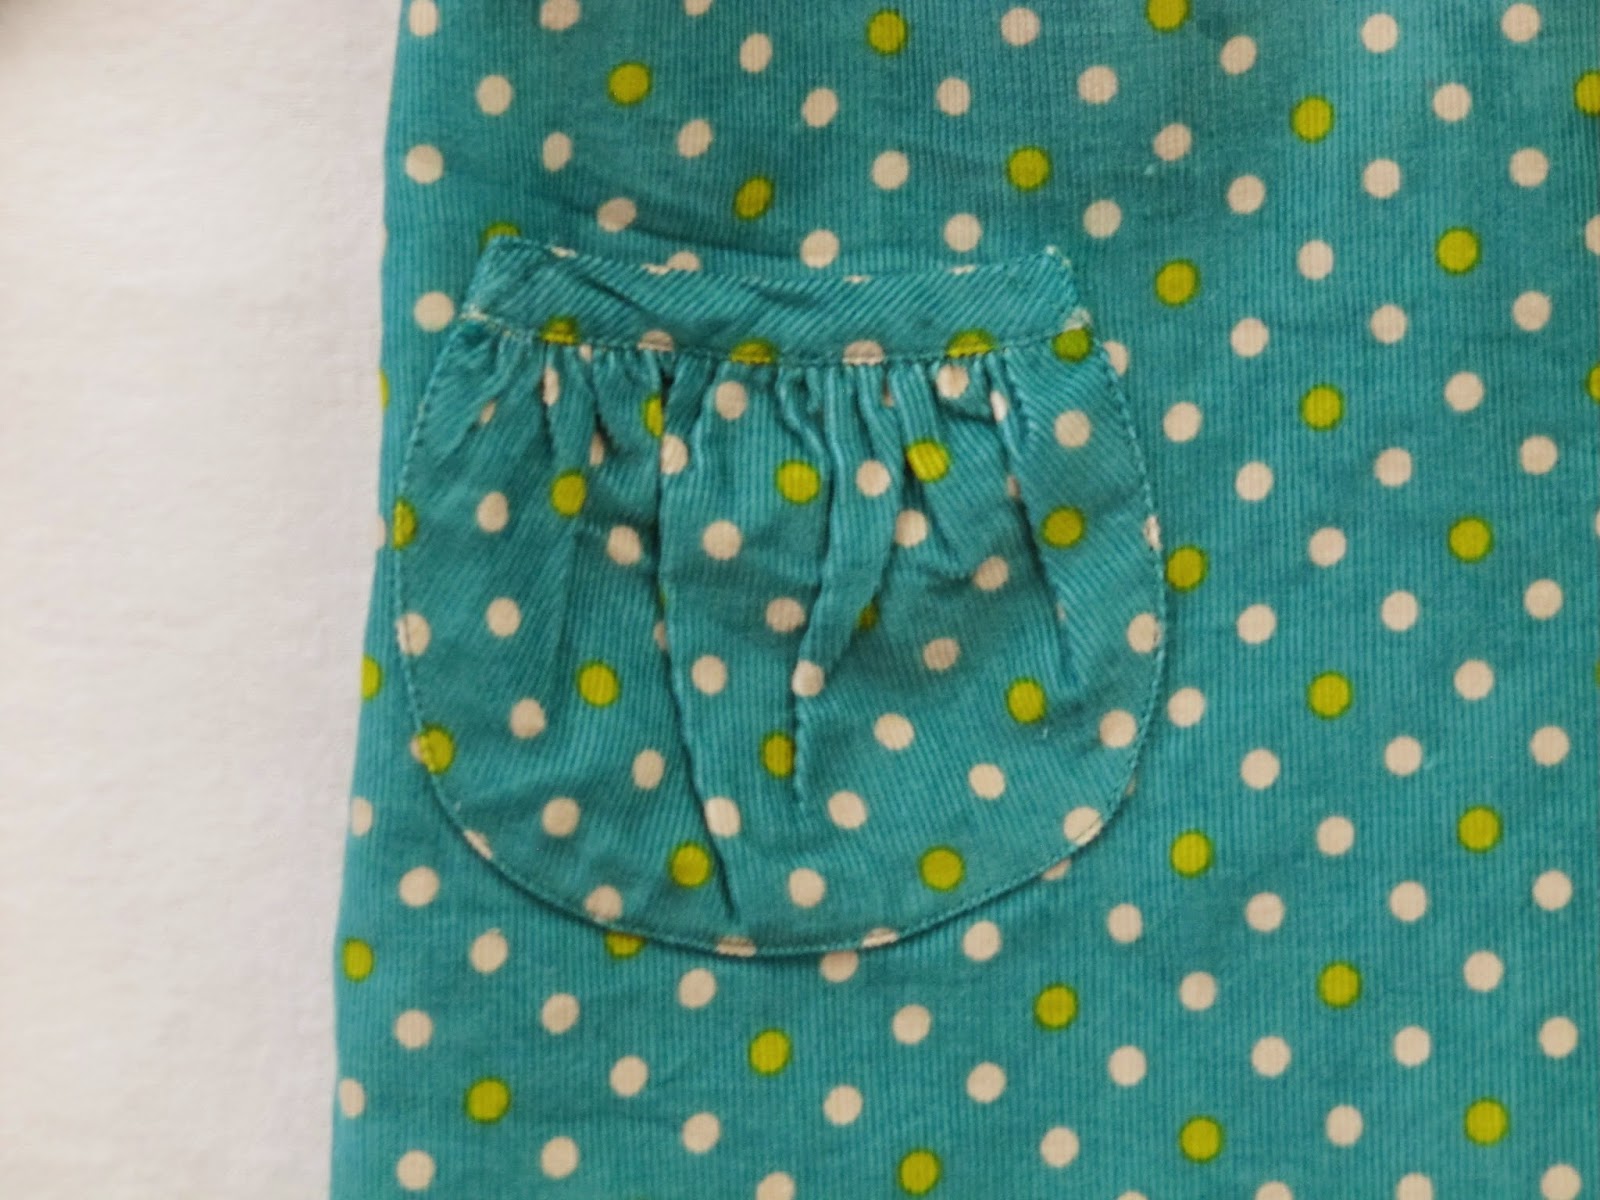
Then I made a front pocket that formed the dog's muzzle and nose area


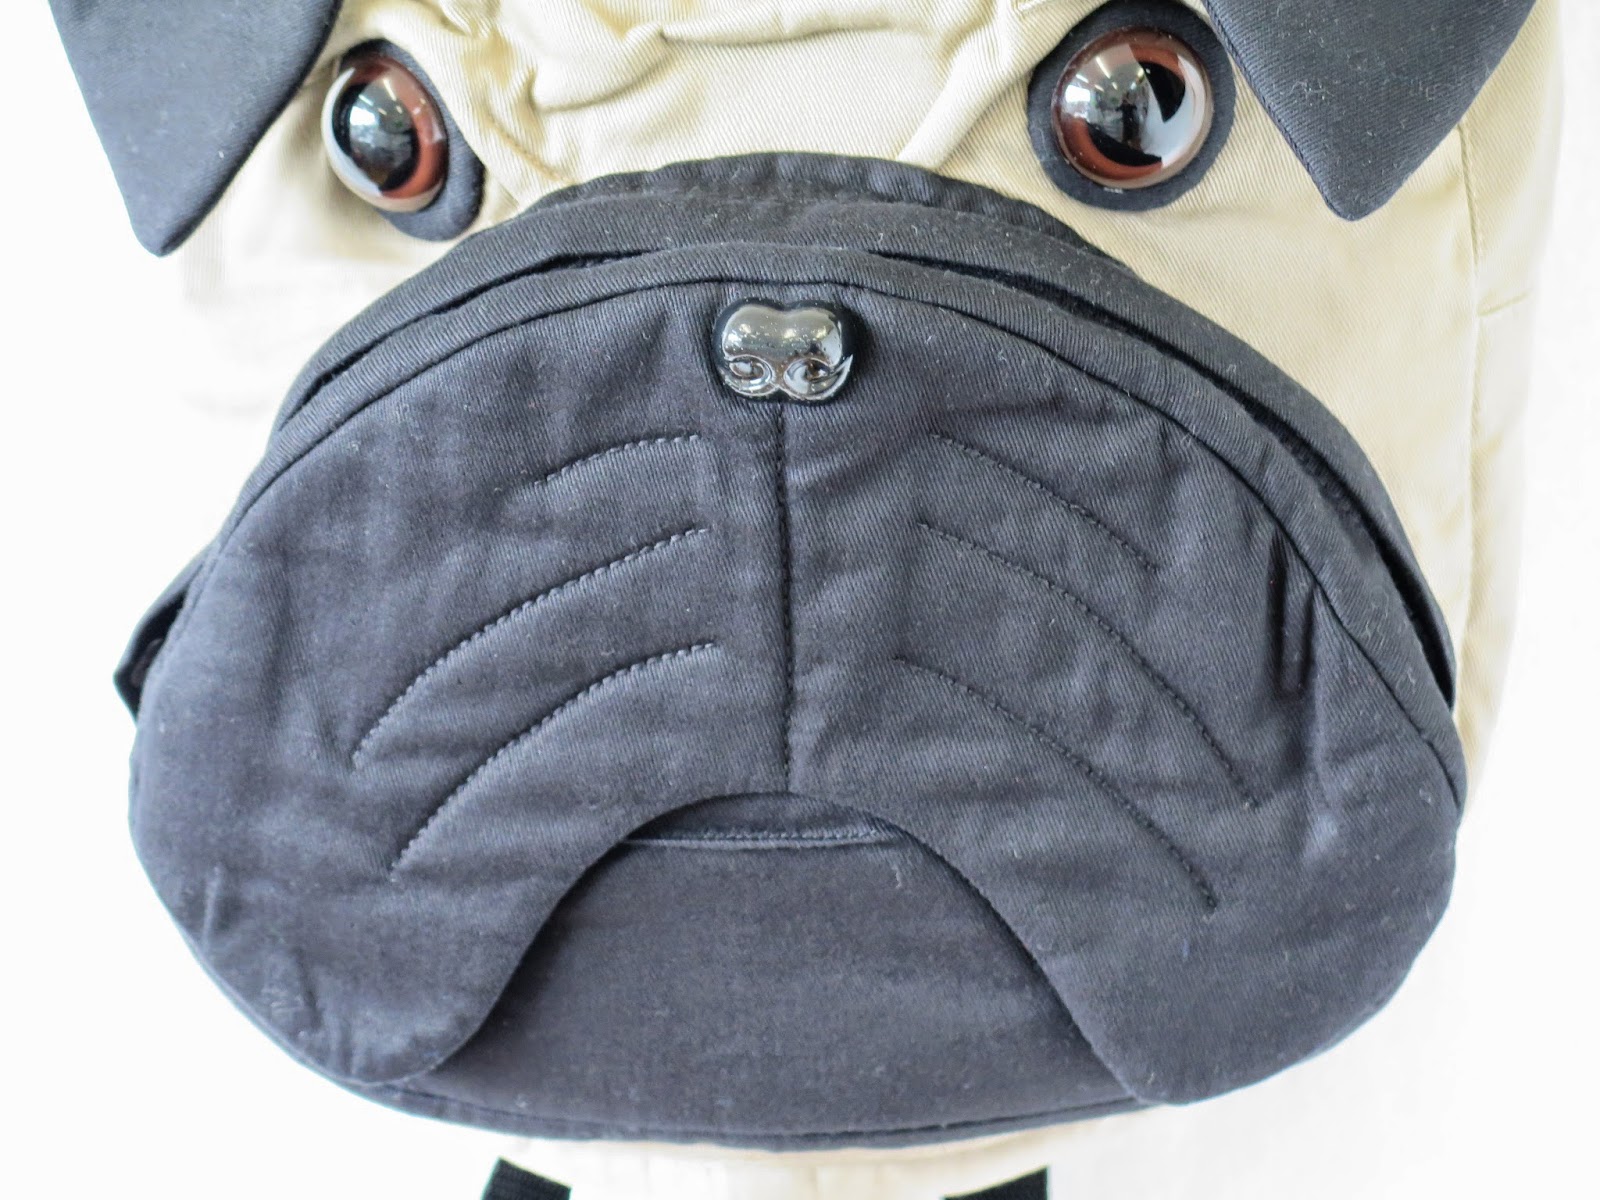
I made a flap to cover the zipper to make it look like a wrinkle above the nose.    Then I added store-bought nose and eyes.  For the eyes, I sewed little black, puffy circles and hand-stitched them in place because the judges' guide states that the eyes of fawn dogs should be "surrounded by a dark mask" 


I made little ears and placed them high up on the head 


The only other modification I made was to make the back panel as one piece and attach the straps from the top of the back panel.  I also added some topstitching to the back panel 


The backpack was lined in some blue fabric I had in my stash.  I considered using a dog-themed fabric but I didn't have anything suitable and it seemed a little ridiculous buying fabric when I already had plenty

internal flap divider with fold-over elastic


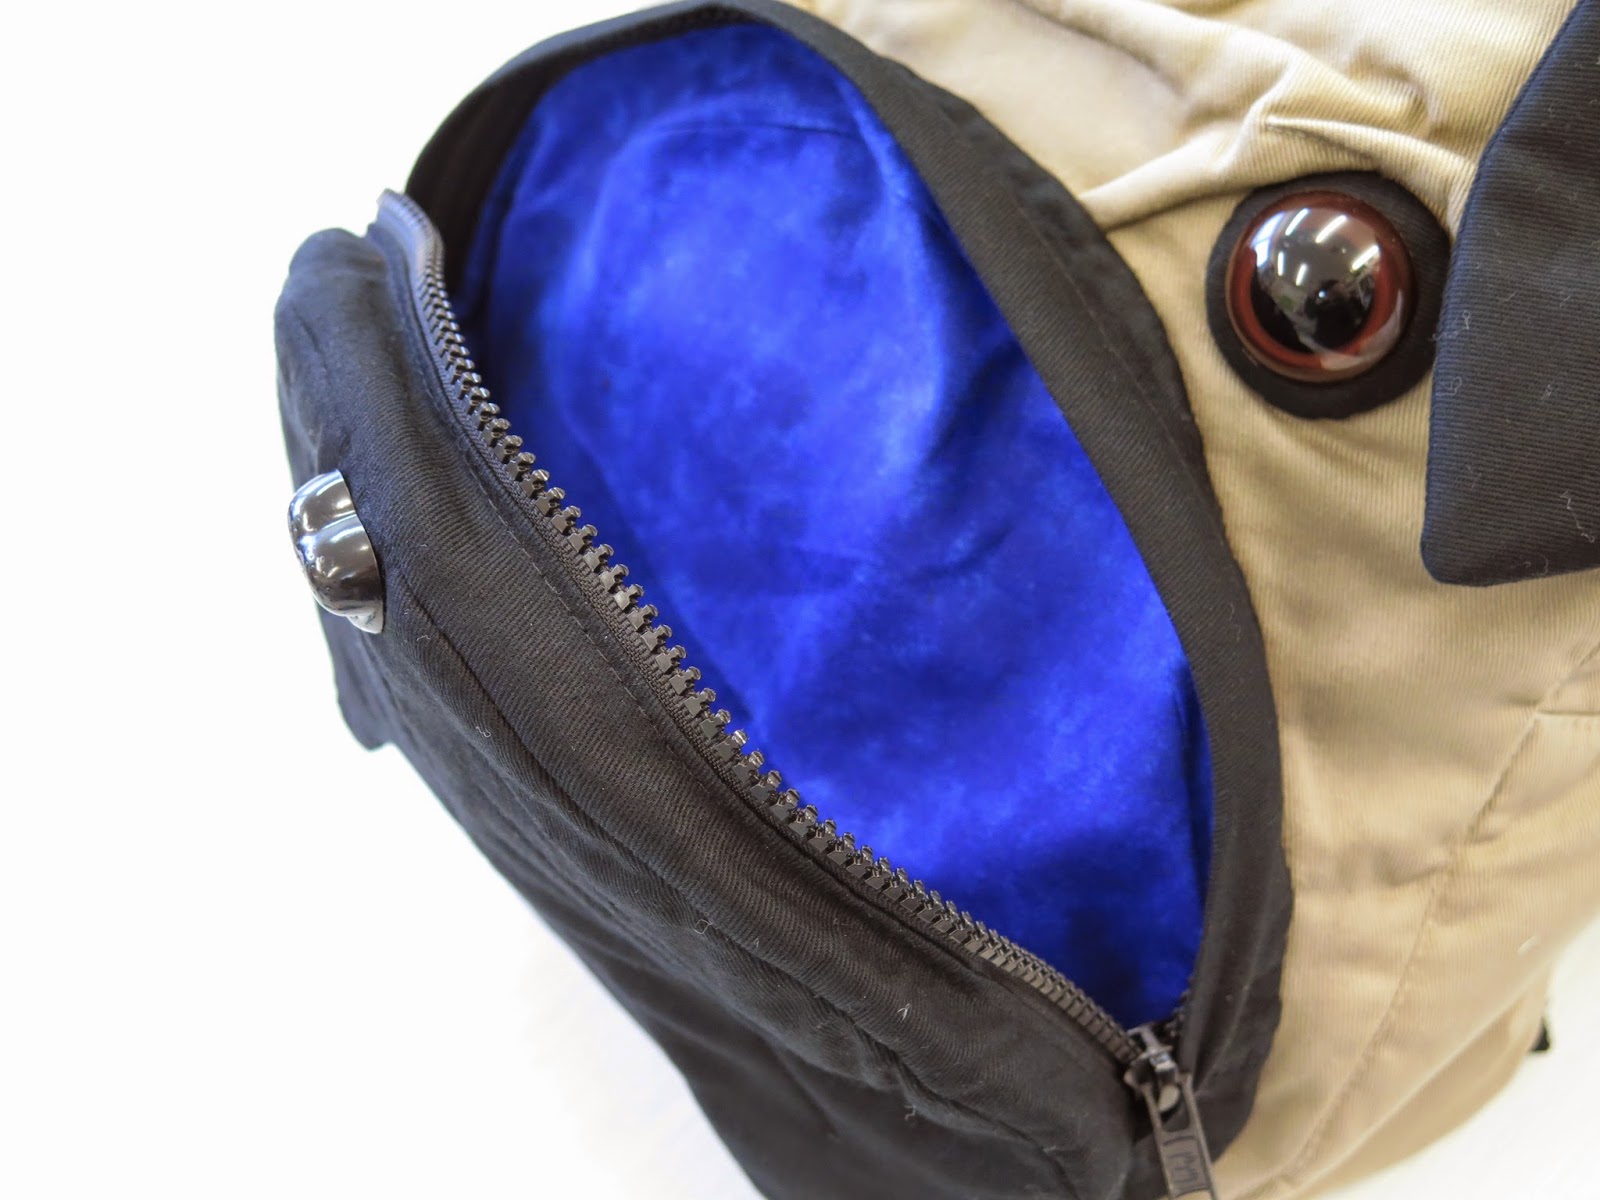
I almost wish I had made this pocket look like the inside of a mouth with tongue, uvula and teeth!


I'm not sure what I am going to do with this backpack.... I suspect it will be destined to keep me and the cow backpack company in the sewing room until I am willing to give up the pug to a good home that will look after it....

 At least I won't have to feed either of them, worry about dog hair everywhere, and nor will I have to get out a pooper-scooper!  Hmmm, right now this is definitely the best sort of dog!! 

Monday 14 April 2014

KCW Part 2

I didn't get as much sewn during KCW as others did but I managed to complete another two items by the end of the weekend.

I snapped up the new Oliver + S t-shirt patterns on Friday (there's something there for everyone!) and then whipped up a long-sleeve school bus t-shirt from some plush velour I had in the stash.

size 4

back hanging wonkily

This was a simple sewing project although I fluffed around with the neck because the velour kept rolling up and moving when I was sewing it.  I probably should have followed the suggestion on the pattern to baste the neck in place but I was a bit too eager to finish and then, of course, I ended up taking quite a bit longer than I had hoped.   So, what should have taken an hour took considerably longer but I'm reasonably pleased with the finished product.  And the less-than-perfect sewing will be hidden when it is being worn

 I eventually achieved a neat neckline!


Yesterday I made a jump rope dress (view B).   The body of the dress is made from a spotted, soft corduroy - with a nice drape - that I bought at Spotlight  and I used more mustard Kona cotton for the collar and placket.  I knew that it would be impossible to get a really crisp finish on the placket if I used the corduroy so I decide to pick out one of the other fabric colours.  I was a bit undecided about making the collar in the same fabric but I checked the Flickr group and saw that people had tried all sorts of colour combinations. So, off I went…


size 4

When I showed the finished dress to my husband, he said it looked like a spotty school dress.  Hmmm, I'm not too sure what that means but I imagine this dress is the sort of thing that a group of 'darls' from an Australian sports team would wear for "dressy casual"… i.e. (way too much of) that garish yellow and green combo.  Luckily, the little girl's mum is an Aussie so she'll probably love it and hopefully she'll be reminded of the warm glow of those golden soils and boundless plains that are just across the sea….


cute little buttons from NYC in just the right shade of yellow on a straight placket (really, it is!)
 
pocket from main fabric to avoid yellow overload


These headed home with dad today so it will be interesting to see if he is as good with a tape measure and squirming girl as he is with a big needle and a different sort of moving target….


Thursday 10 April 2014

KCW

I thought I would join in the fun of Kids' Clothes Week and try to sew little things for at least an hour a day this week.  I managed to do that until today.  However, I put in the hours earlier in the week - although I haven't been that productive - so I'm not feeling like I have struck out

I have only made three items this week and, perhaps predictably, all of them have been Oliver + S patterns.  For two of those items I even used the same pattern: the raglan t-shirt.

The first top I made was a simple t-shirt with a print.

size 4

I found the crown print at thegraphicfairy.com and used TAP paper to apply it.  It was only after I sewed up the t-shirt that I discovered that stretching the fabric wasn't such a good idea because it stretched the print.  Now, the red fabric of the crown looks old and wrinkled and some of the pearl prints have lifted off.  My solution was to order some pearl hot-fix elements from the USA and I will apply them over the top of the pearl prints when they arrive.  I'm hoping they will look like they were always meant to be part of the design


Next, another top using the raglan t-shirt pattern but this time I made a funnel-neck knit top.  In February, the Oliver + S blog ran a series on customizing the raglan t-shirt pattern.  One of the posts was on how to make a funnel neck kangaroo pocket sweatshirt and I used that little tutorial to make a top out of some Birch Organic Elk Grove knit fabric I picked up at GJ's Discount Fabrics in Melbourne.  Lightning McStitch, aka the Enabler, introduced me to this great little shop last time I was in the city and I know that the next time I am there I will be taking the tram back to Lygon Street to see what goodies they have for me!

size 5

 In the end I decided not to make the kangaroo pocket because I knew I was too lazy to try to match the print on the shirt.  I  wondered about sewing inseam pockets instead but I guess I was too lazy for that also.

 I used the flatlock stitch on my new overlocker to sew in the sleeves and I cut out about 1cm from the front neck edge on the t-shirt to be sure that this top would fit over my little friend's head.


coverstitched hems and flatlock seams

more photos of cute top

I love this fabric and I really love this pattern modification.  I'll definitely be making more of these and, knowing how easy this was, I may even try to use the basic pattern to make a little hoodie.  And I might have to make one in my size!

My third completed item for this week is a forest path cape

size 4

I don't really know what the main fabric is.  It certainly isn't a wool but it has a nice feel and drape and looks a little Chanel-like but was considerably cheaper!  I bought this fabric, the lining and the buttons from ClearIt in Melbourne

Alannah Hill lining fabric

The fabric frayed the second I looked at it and next time I use it - because I have several more metros! - I will probably overlock the edges as soon as I cut anything out.

I spent quite a bit of time making sure that the plaid pattern was matched on the two front pieces

pretty shell buttons with swirl pattern

Overall, a good result although I will probably choose an easier fabric to work with when I make this again!

What else will I do this week?  There is plenty to do:


 I have some knitting that I started on the weekend for one little lad and, hopefully, another friend will send me her kids' measurements so I can get cracking on clothing for them…

Thursday 27 March 2014

a lullaby collection

The arrival of the new Oliver + S lullaby layette pattern was very timely because I wanted to make some baby clothes for another workmate expecting her first child.  My workmate convinced me to start this blog because she had one and it seemed to be very popular.  She was also having a lot of fun writing about her sewing adventures.    Although she decided about two years ago that it was no longer her 'thing' to write a blog, I still hold her responsible for getting me started and I feel we have a bit of a bond (A sort of bloggers' bond or a sewers' bond).  So, of course,  I had to sew her something for her baby!

I had already cut out another of Spacefem's space captain bodysuits and I quickly sewed it up

I heard recently that in the "Star Trek" shows it was only ever the cast members wearing red who were eliminated….


But I also wanted to have a go at making the bodysuit included in the Oliver + S pattern.  What I particularly like about this pattern is that it is intended for woven fabrics.  I have lots of these as well as a number of non-stretch knit fabrics which would obviously work for this pattern, too.   

I had another cotton quilting fabric from the Woodland series by Natalie Lymer for Cinderberry Stitches left over from the sparkle punch quilt so I used that fabric to make a bodysuit to go with the jacket  

size 12-18 months

jacket and bodysuit ensemble


When I picked the mustard-coloured bias binding for the jacket I hadn't realized that the fabric I used for the bodysuit had yellow dots over it.  So I was delighted when I realized how serendipitous this was… And then I discovered I even had yellow snaps!


front placket and neck bias binding


snap placket


The only thing I did differently from the pattern instructions was to make a box pleat at the back rather than pressing the fold to one side. 


back with box pleat and lots of wrinkles!


I'm pretty happy with this pattern and how this bodysuit turned out.  Perhaps, even a little more than happy.  However, I realized that the fairy fabric I used probably wouldn't be the first choice for the expectant mother because she is having a boy!    So I made another one…


size 12-18 months


This time I used a Robert Kaufman flannel, Daydream Girl,* for the bodysuit and a spotted creamy quilting cotton for the bias binding and front placket.  I made the long-sleeve version, and sewed the box pleat in the back again


And the snap stash had some ivory snaps to finish off the bodysuit.


front placket


snap placket


I hope these will prove useful and get a bit of use.  If so,  I will probably make many more of these bodysuits because they are a bit different to what is on offer in the shops and the sewing patterns available.  I have some Michael Miller Dino Dudes fabric stashed away for just the right pattern and I think this is it.


 Finally, I also made up the trousers in the pattern set.  I used a denim fabric and yellow topstitching thread.

size 12-18 months
back view

back pockets


I'm a little ho-hum about these but I think it is because of my fabric and thread choices.  The pants on the pattern envelope look much better than these and I think they would look good in a (non-stretch) sweat-shirting fabric or even a ponte knit.  I might even be able to find some in the stash….


* not a very manly name but a fairly 'safe' fabric choice nevertheless


Wednesday 19 March 2014

a little jacket made entirely from the stash

There hasn't been much time for sewing lately because work commitments have kept me out of the sewing room.  However, I managed to find a few hours on Sunday to sew up the reversible jacket from the new Oliver + S lullaby layette set pattern.

Initially, I decided I would make the bodysuit as a baby present for woman at work about to go on maternity leave.  The fabric I wanted to use needed to be pre-washed and, as the weather was miserable here, I knew it would take a few hours to get it washed and dried.  A few hours I didn't really have.  So I hunted through my stash for some fabric and found some left over from this quilt


side 1

reverse side

The fabrics are both from the Woodland series by Natalie Lymer for Cinderberry Stitches.  I used a mustard cotton (?Kona) for the bias trim.  I like it - I think it makes the jacket pop.  And it matches the fairies' wings.

Side 1with bias binding. Notice how I matched the design at the front edge!  A first time for everything

I used a Clover bias binding gizmo to make the binding.  My perfectionist tendencies were rewarded with even bias binding and stitching that looks good from both sides.  It might also have something to do with the hour it took me pressing the bias into shape, sewing at turtle speed and unpicking stitching when it went wonky.  Oh well, I think it was worth it!

reversed side bias binding

And have you noticed the snaps?  A perfect match for this teal blue!  These were also in my large collection of snaps from the Snap Source.  I love these snaps because there is so much choice in the sizes and the colours offered.  I have used these on nearly everything I have put snaps on lately and they seem to have held up to constant snapping.  I noticed today that Oliver + S are selling these snaps in their website shop in size 15 (I used the size 16 here).

I made the 12-18 month size of the jacket and think it will be great in these cotton fabrics to wrap around a baby during the warmer months.  I think next time I will use some flannel or some wool as other have recently done.  But this is definitely a pattern I will use again.

back of reverse side

back of side 1

Thursday 13 March 2014

Pretty in pink

Almost four years ago* I made another friend a lap quilt.   I used mainly Kaffe Fassett fabrics in her favourite pink tones.  I'm a big fan of bright colours and I was delighted with how this quilt turned out.  So much so, that I have been meaning to make myself one ever since.…

pineapple block quilt from  Paper Piecing with Alex Anderson

My friend had a baby girl in September and, of course, I had to make the new addition to the family some goodies.  I knew that it would be ok - or even expected - to make something pink so I pulled out my Oliver + S patterns and sewed another birthday party dress


size 12-18 months 

back 

This is very much an international dress: the pattern is from the USA, I bought the lawn in London at Liberty, and the buttons came from Buttonmania in Melbourne (during my trip around town with Lightning McStitch and her little assistant in February)

sweet little, colour-matched buttons

crisp pleats!

I also knitted a little top for the new baby - during my Christmas holiday - but didn't get around to putting the three buttons on it until early this week!!


Whereas the dress was an international effort, this is every bit a kiwi knit: the pattern, Hine, is by Kelly Brooker of Pekapeka design studio and the yarn is a beautifully soft 100% alpaca called plush from Doe Arnot of Oamaru Weaving.  I bought this yarn after Taryn of forkandneedle opened my eyes to New Zealand Made back in July 2013 and I discovered Doe's yarn being sold online at Felt.  Luckily, I have a few balls of this left over, and some other yarns I just had to have….

The top has a lace sleeve detail


and it is mostly knitted in the round so I didn't have any seams to finish!  It is knitted from the top down and once the sleeves are completed it is a very quick knit.  Perfect for holidays or knitting on a plane.

I think this is such a sweet top and hopefully I will find a few more girls I can knit it for.


Finally, I finished up the other presents for my friend I made the knitting bag for.  As I mentioned, this friend is very clever.  So clever, in fact, that she is affectionately known as Nancy Fancy Pants.   So, when I ordered the Spoonflower fabric for the children who received the pillowcases, I also asked Shelley Aakjaer of ShelleyMade to design a fabric for Nancy Fancy Pants

This is what she came up with

             Personalised Name Fabric - Pink 16 Small


So I ordered this design in cotton silk and silky faille and sewed Nancy some Fancy Pants


Nancy Fancy Pants's fancy pants

I used the Tried and True everyday knickers pattern from The Makers Journal.  The pattern is intended for light weight woven fabrics and is actually pretty easy to sew.   I spent quite a bit of time looking at the stitching on some of my own knickers and I copied the triple zig-zag stitch used to topstitch the knicker elastic in place.  I think these could just about pass for store bought but, at any rate, they are a zillion times better than the undies our mum made us when we were kids!!  Who would have thought that I would sew homemade knickers after the trauma inflicted on us all those years ago (although, to be fair, I'm not having to wear these ones)?    And, who knows if Nancy Fancy Pants will think these are fancy enough for her….


* I was in the process of sewing the blocks for this quilt when the September 2010 earthquakes struck Christchurch.  There was quite a mess in my sewing room - and elsewhere - but the blocks remained on the table where I had left them!


Really, this is a bigger mess than usual!!